Overview
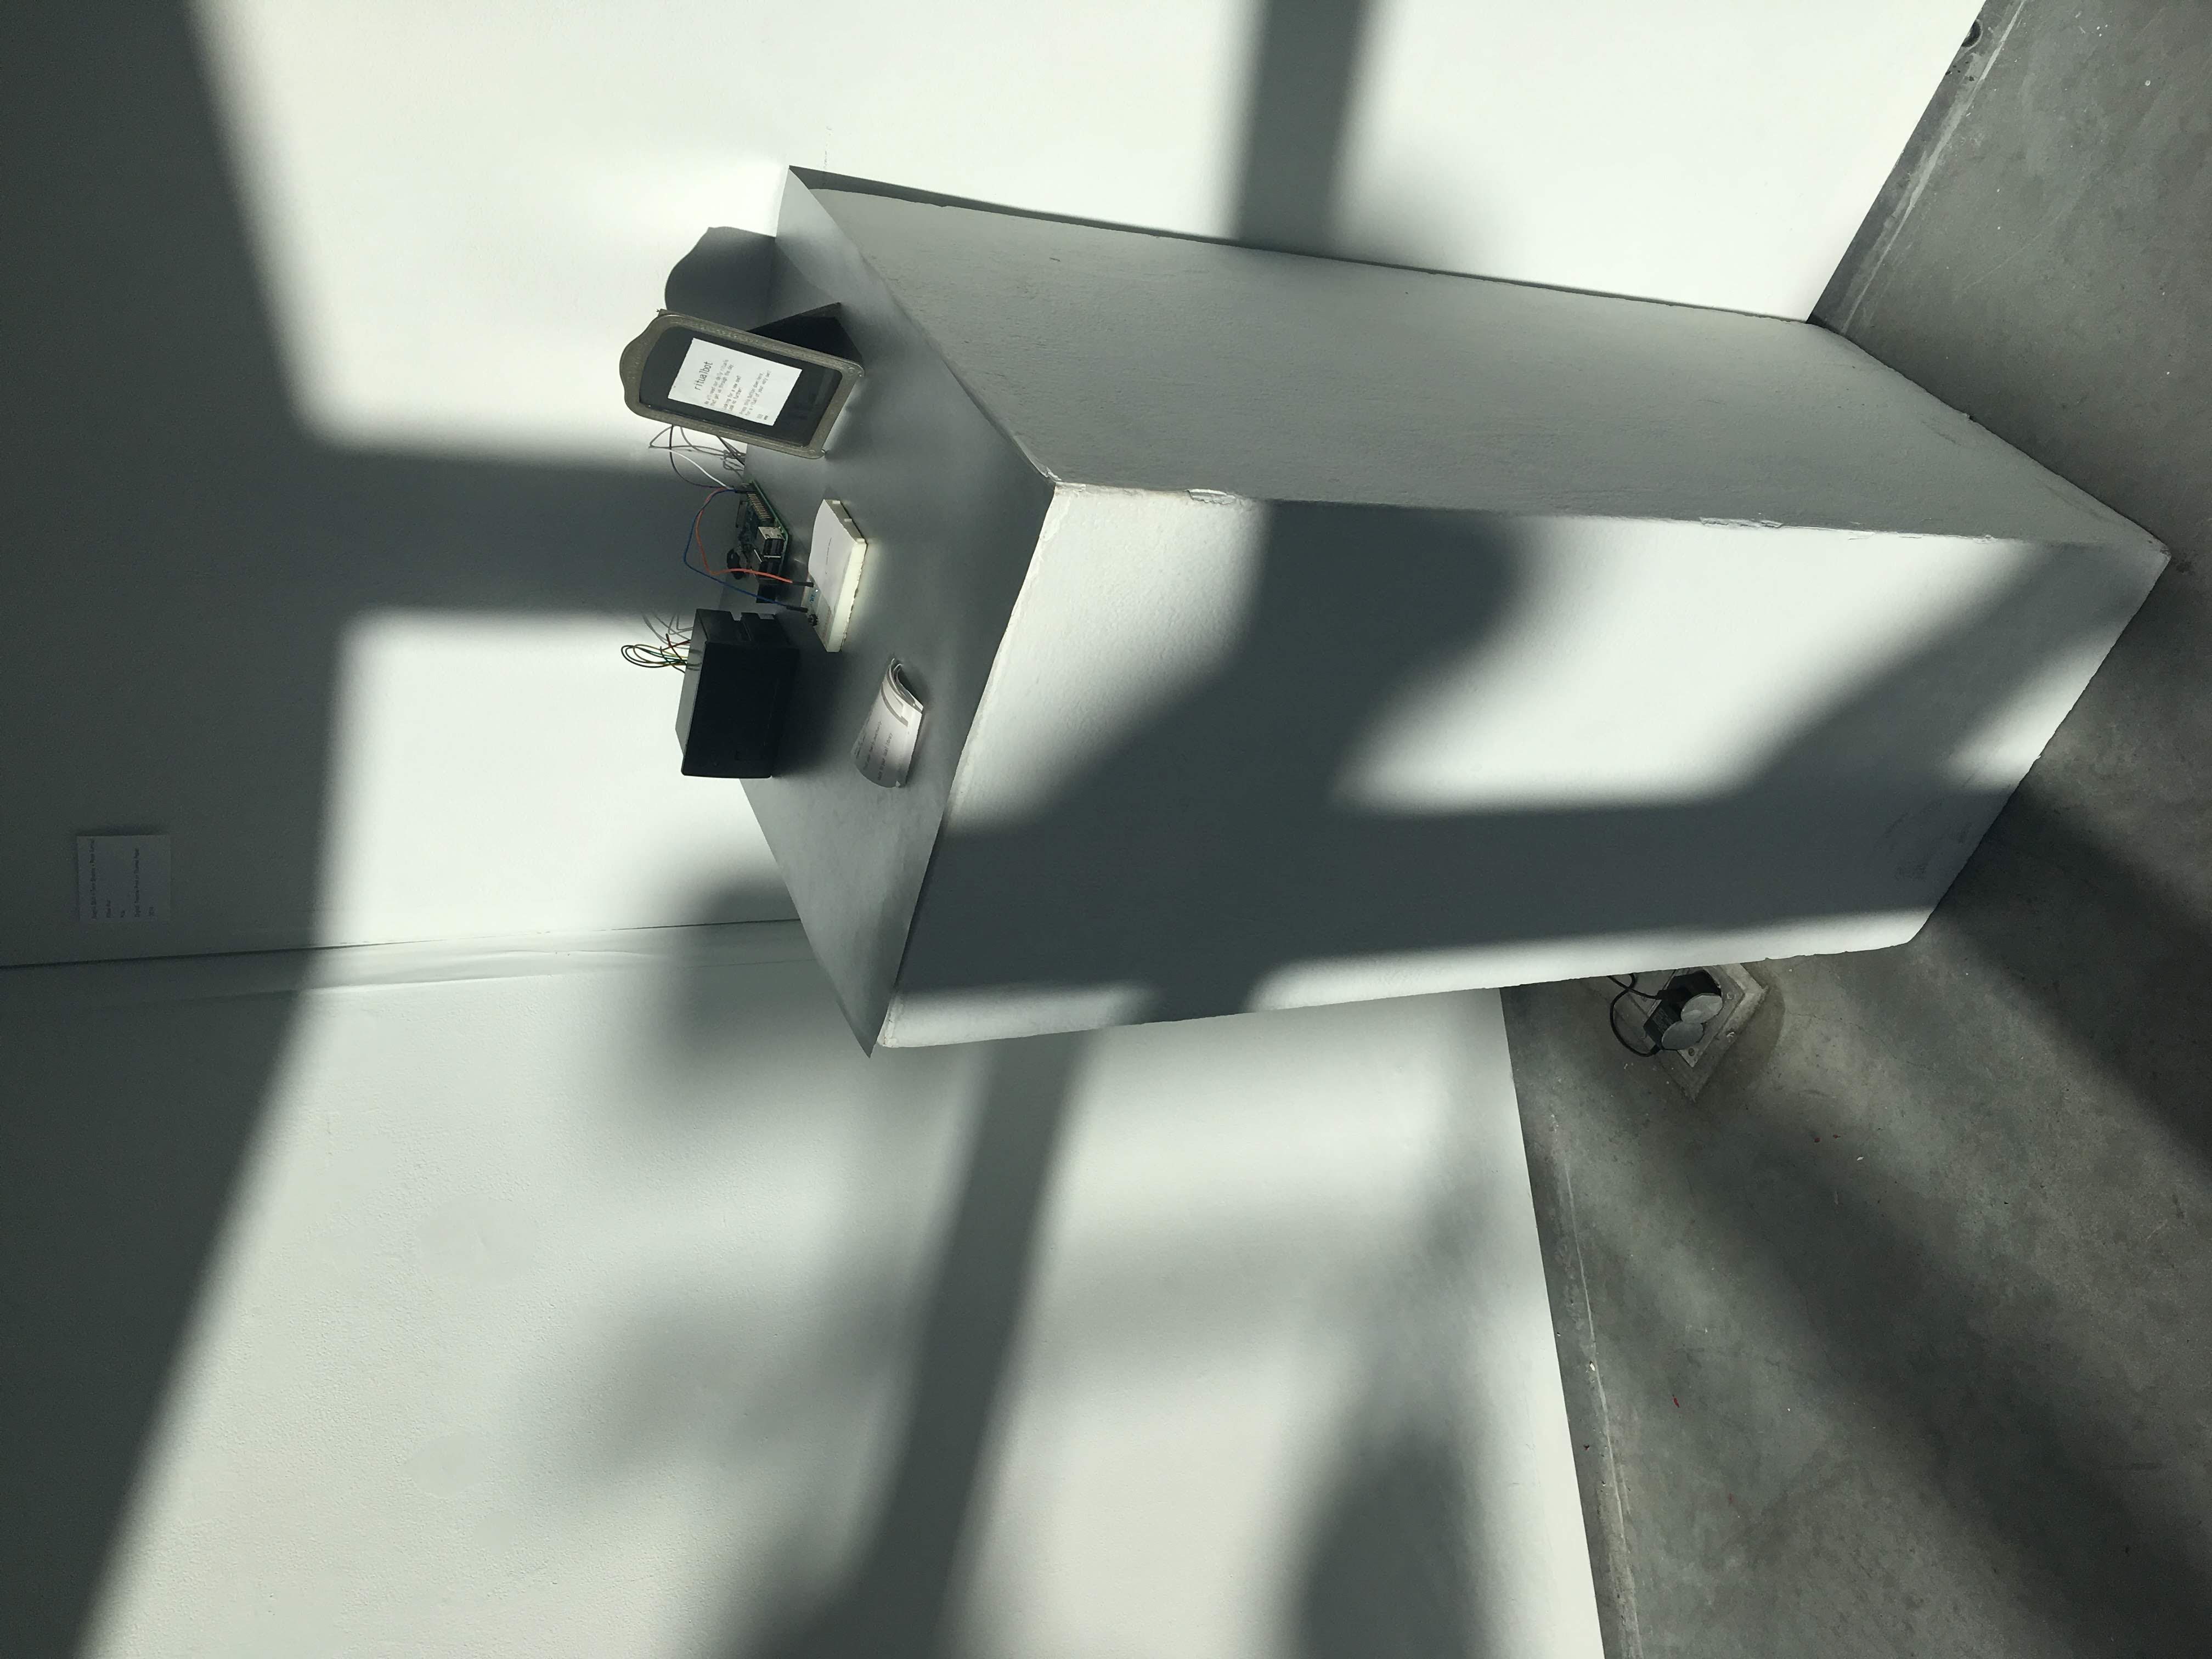
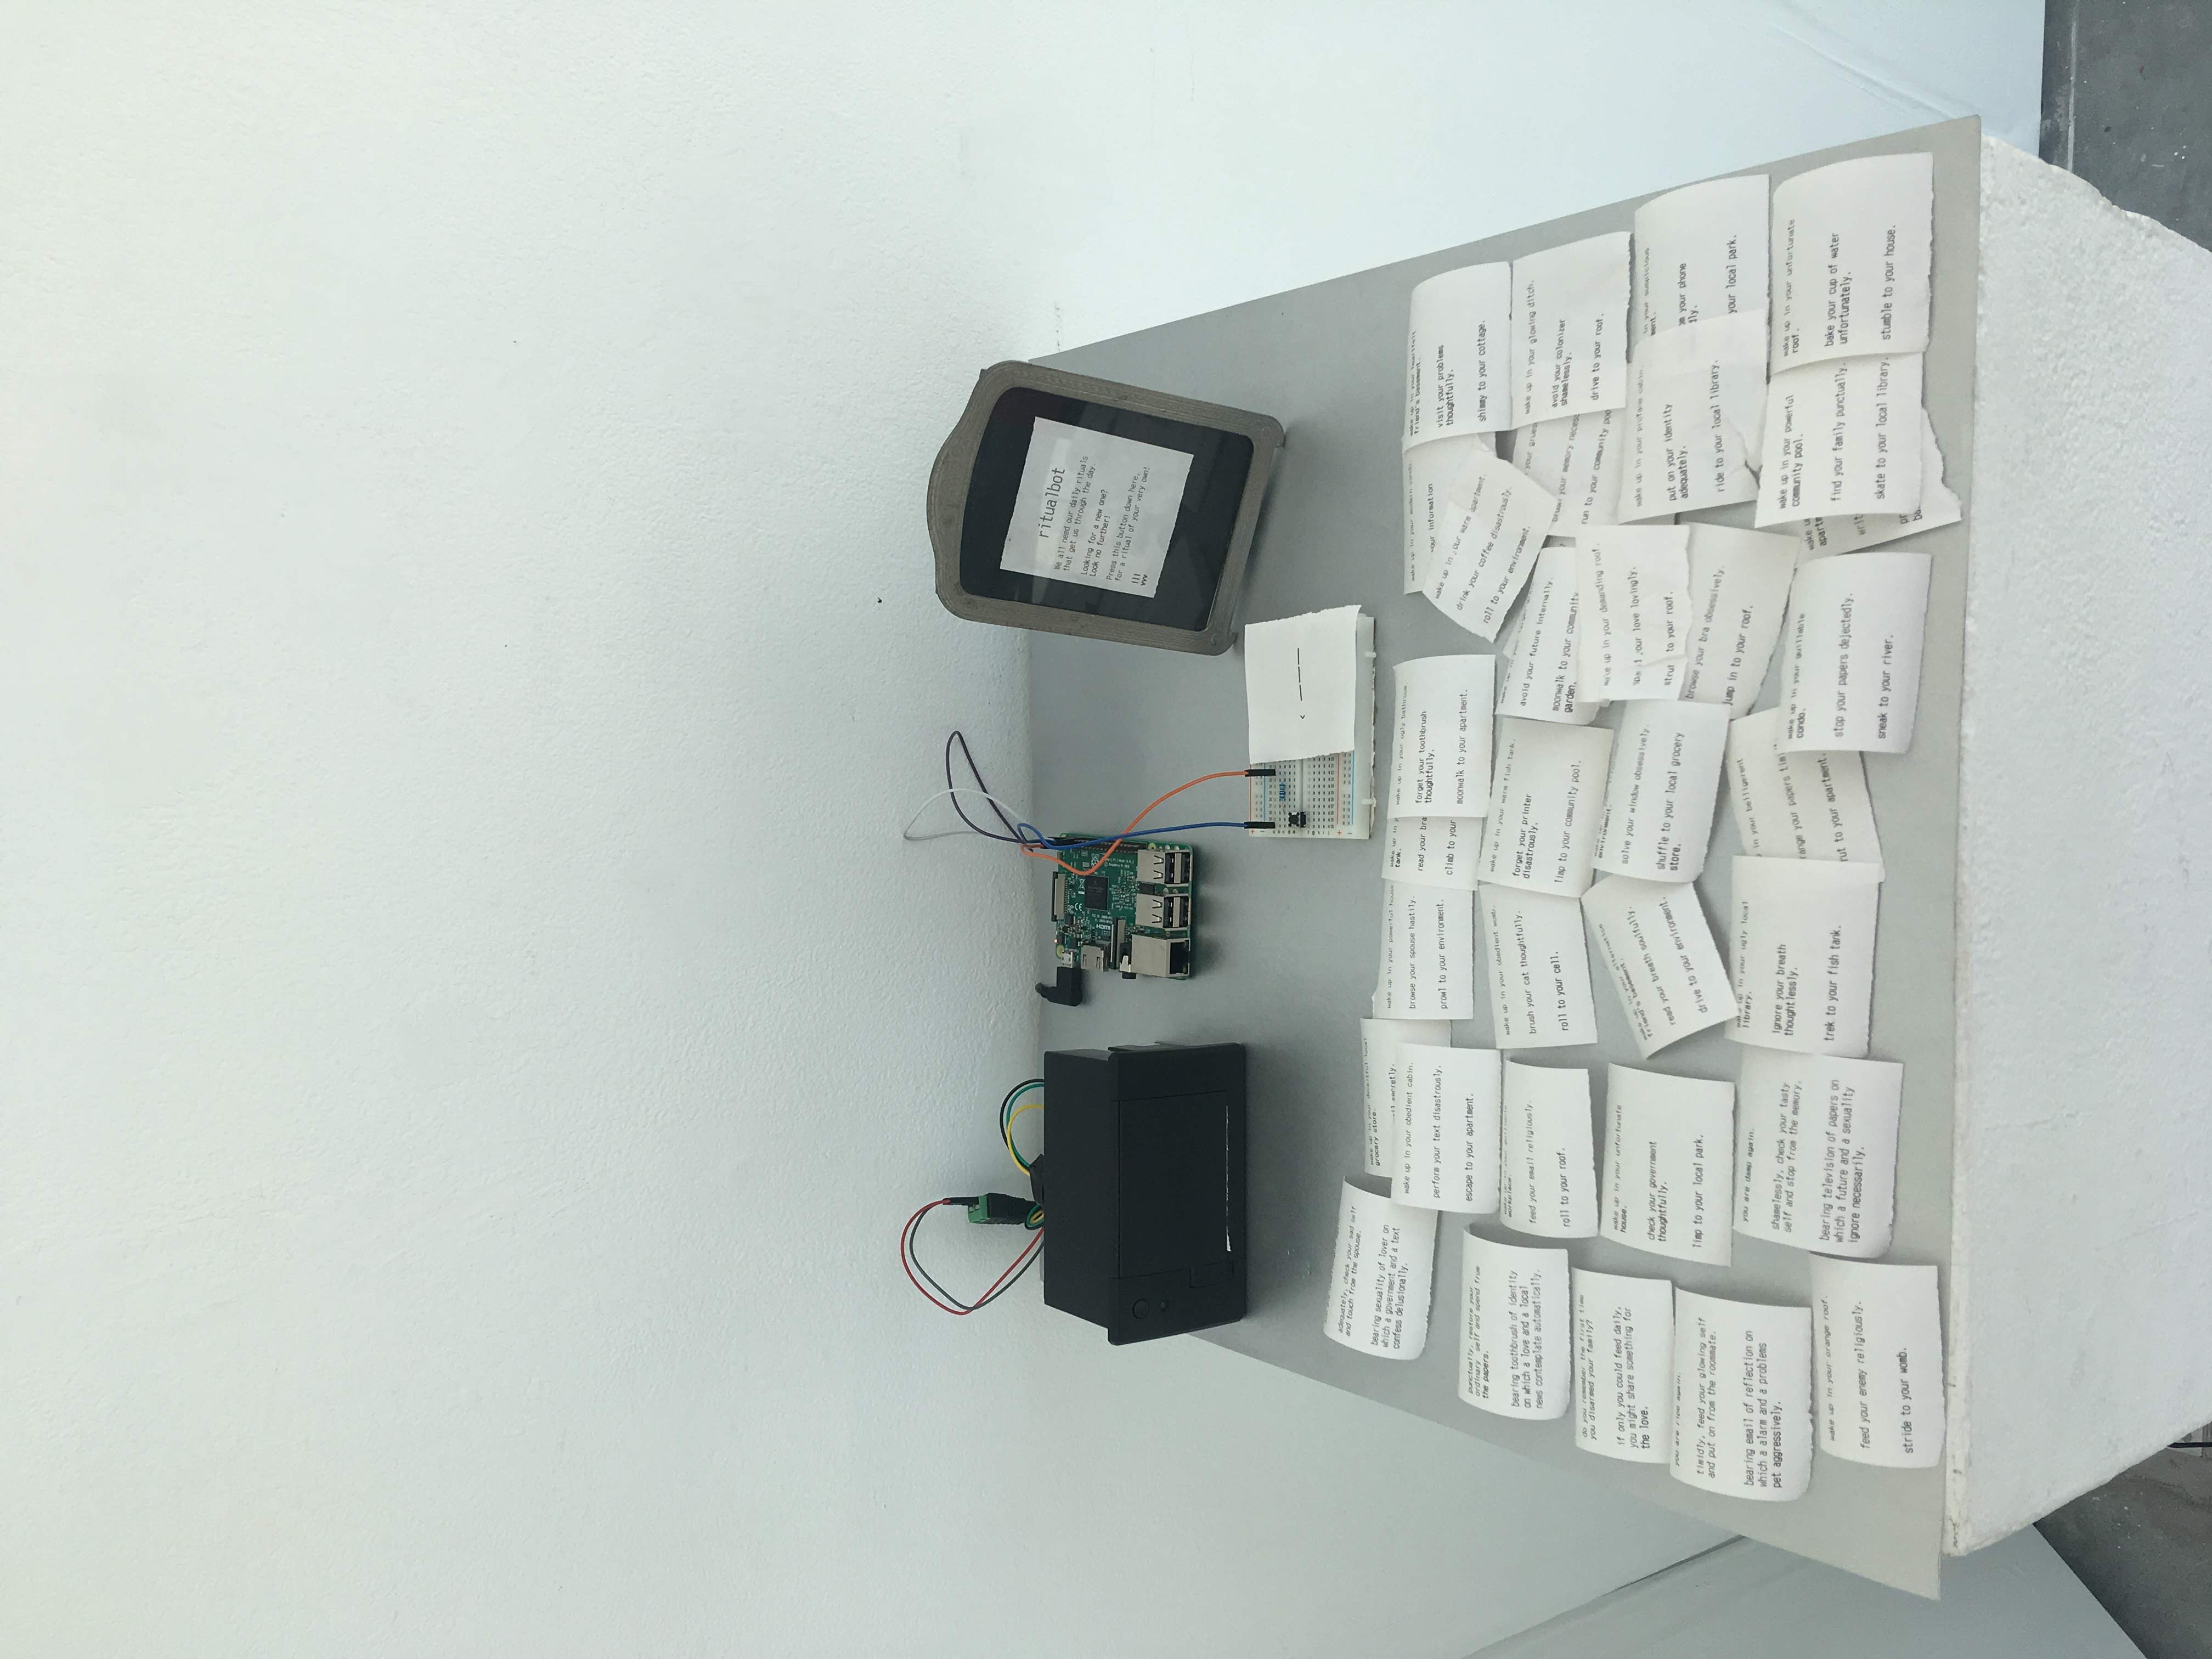
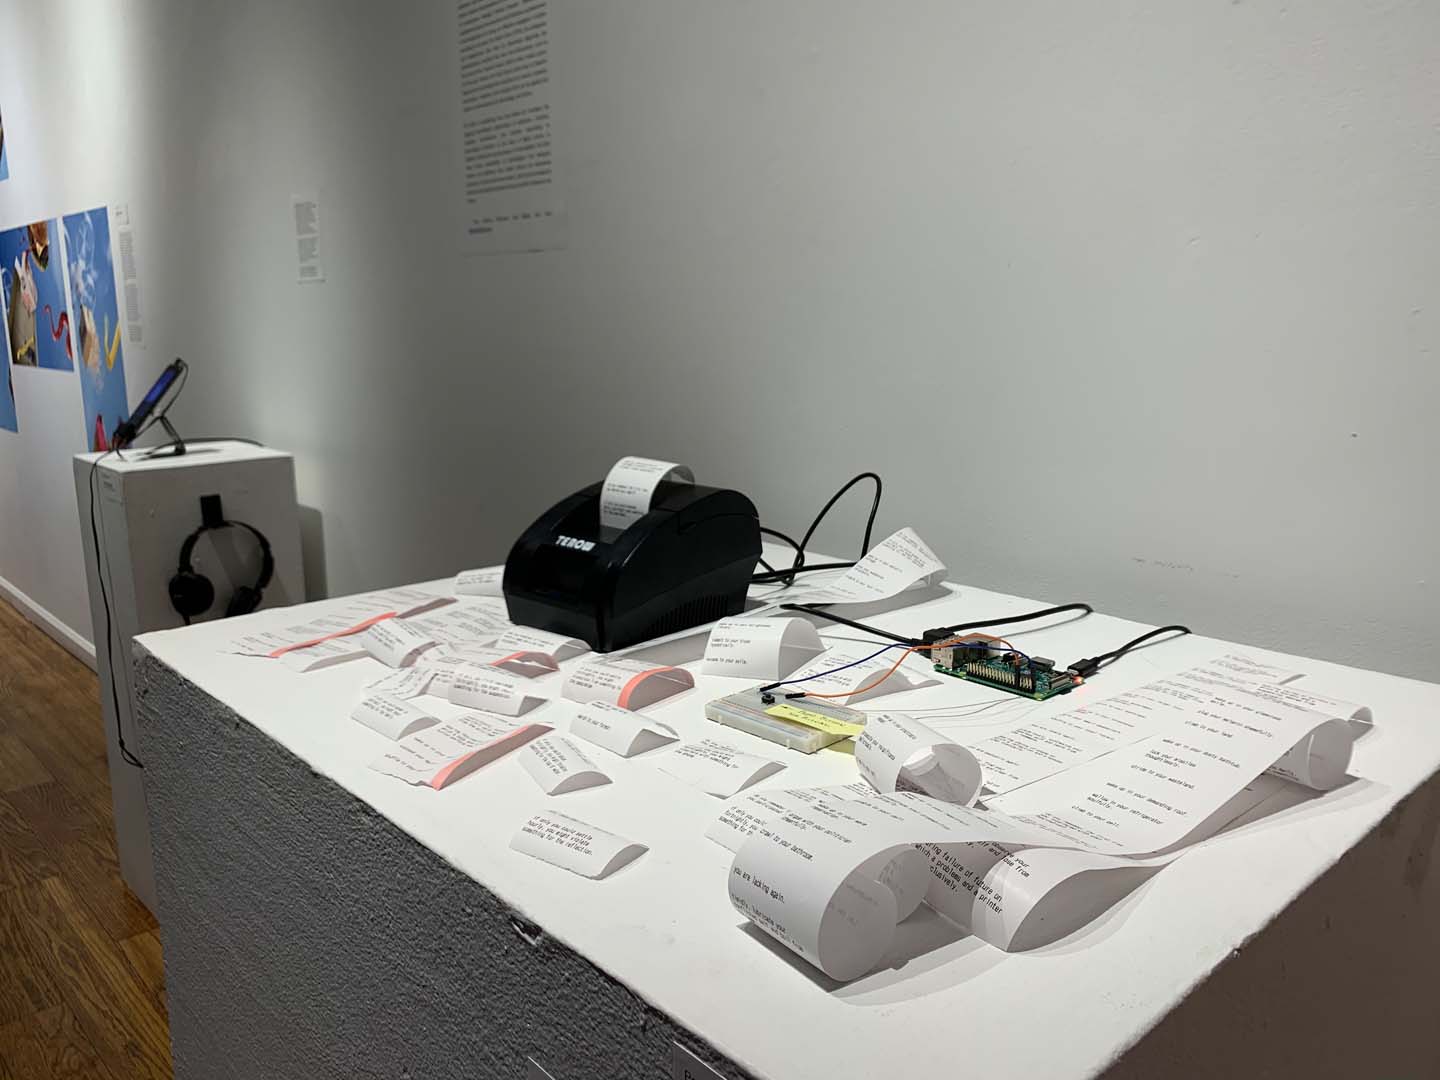
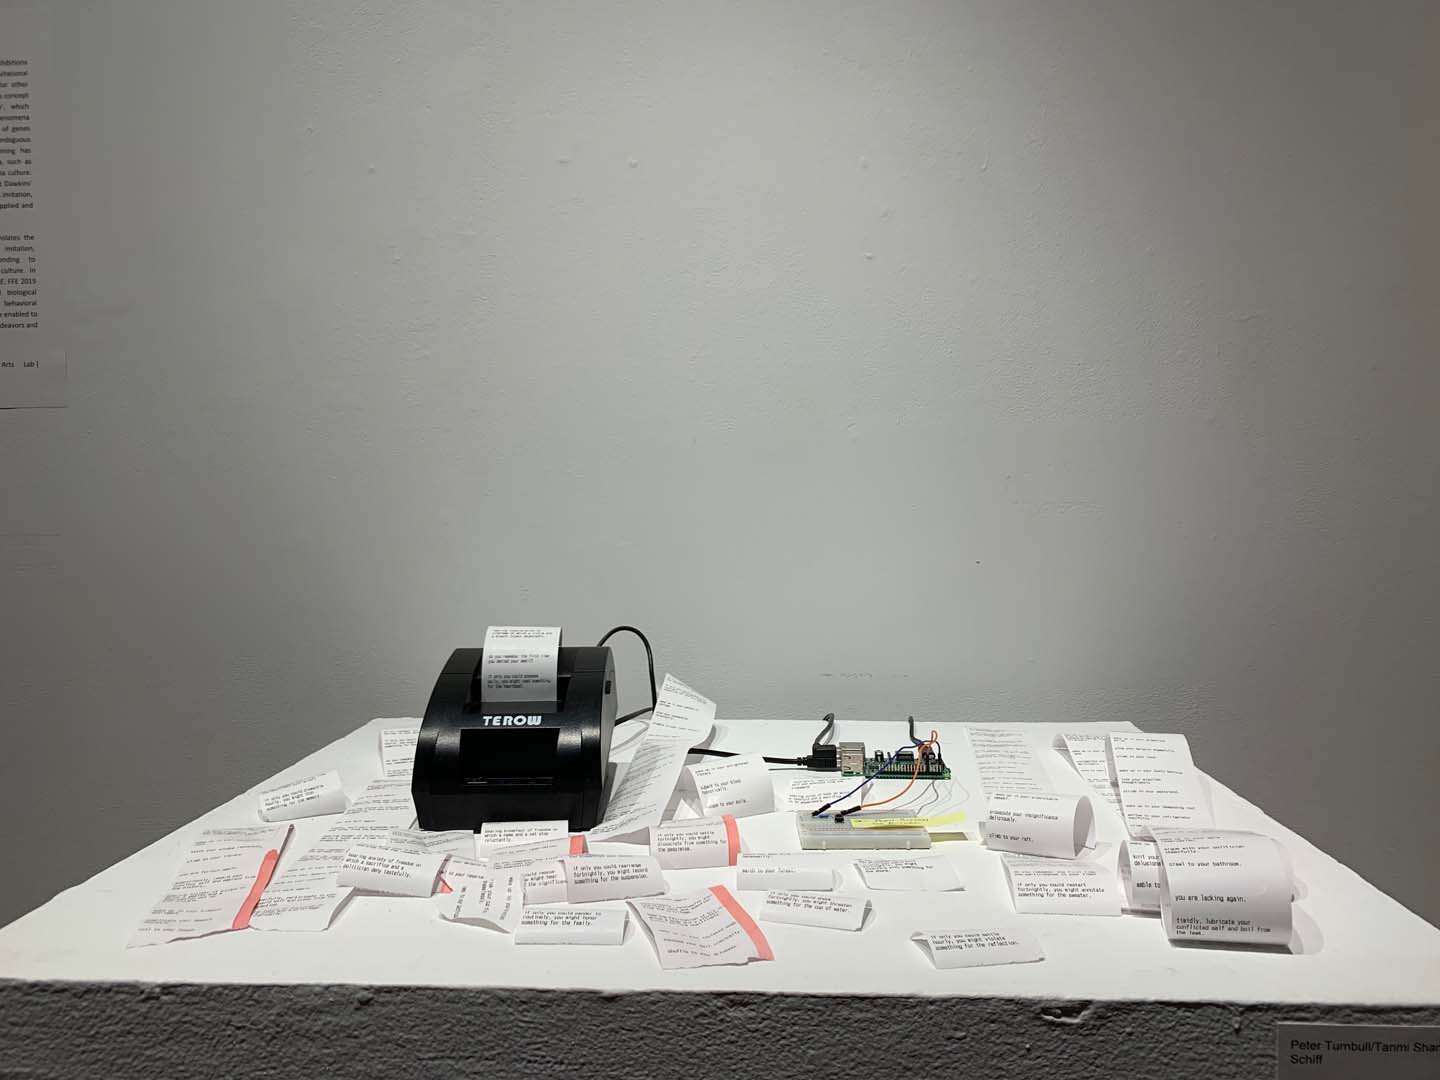
This project is a collaboration with Tanvi Sharma and Sophie Shiff, two colleagues and friends of mine here at MICA! This piece makes use of a Raspberry Pi, a thermal printer, some Python code, and Adafruit IO (yep, it returns!) to generate rituals for visitors to take with them. The random nature of the generation can result in rituals that are strange and bizarre, or oddly poetic.
Tanvi and Sophie created a twitter bot that generates “rituals” for the user to follow, or maybe not. This initial bot was created using Tracery, a language generation tool by Kate Compton.
They then approached me to suggest we work together to create a physical version. I happily accepted! Work on the project took about 3 weeks, to prepare for submission to several shows.
This project was selected for the Ritual show here at MICA, and was on display in the Gateway building from September 15th to October 15th, 2019.
We also submitted this piece to the Fuse Factory’s annual exhibition, TechnoMEME 2, and it was accepted! We sent ritualbot to the Cultural Arts Center in Columbus, Ohio, where it was on display from November 1st to December 7th, 2019.
Software
The physical version of ritualbot is meant to emulate the Tracery-based twitter version as much as possible, but is instead built in Python 3, for ease of interfacing with the thermal printer over the Raspberry Pi’s serial ports, and to talk with Adafruit IO.
Adafruit IO Code Part 1
When the Pi boots and this code starts running, it needs to establish a connection to Adafruit IO and collect some data. We make use of 10 different feeds, 8 of which are word types and store a large list of words (adjectives, adverbs, movementVerbs, nouns, occurrences, pastVerbs, placeWords, verbs), and the other 2 are for diagnostic/statistical purposes (monitor, counter). Many of these feeds could very likely be combined together, but for ease of use and for the sake of time, I kept them separate.
The Pi requests all the data from each word type feed (each of which is represented as an array), and then creates new arrays of each word type by using a for d in array style for loop that specifically takes the value of each “post” to a feed and sets it as an element in this new array (otherwise we’d get a lot of metadata attached to each element).
Setup Code
After collecting our Adafruit IO data, we set up our ritual generation object. The class for ritual generation contains several functions for actually making the strings that will be printed out, which we will discuss in a minute. But first, we establish our connection to the button over the Pi’s serial ports, and set up a button callback function. When the button is pressed, we check to see when the button was last pressed to prevent abuse, and if it’s been long enough, we run our ritual generation code.
Ritual Generation Code
There are two main steps to creating a ritual in the code. First, we select an “origin”. This refers to how the ritual begins and the overall structure of the ritual. For example, we have a ritual structure that begins with “you wake up in your [random adjective] [random place]”, one that begins with “you are [random adjective] again”, and one that begins with “do you remember the last time you [random past-tense verb] your [random noun]?”. The full structures of each are as follows:
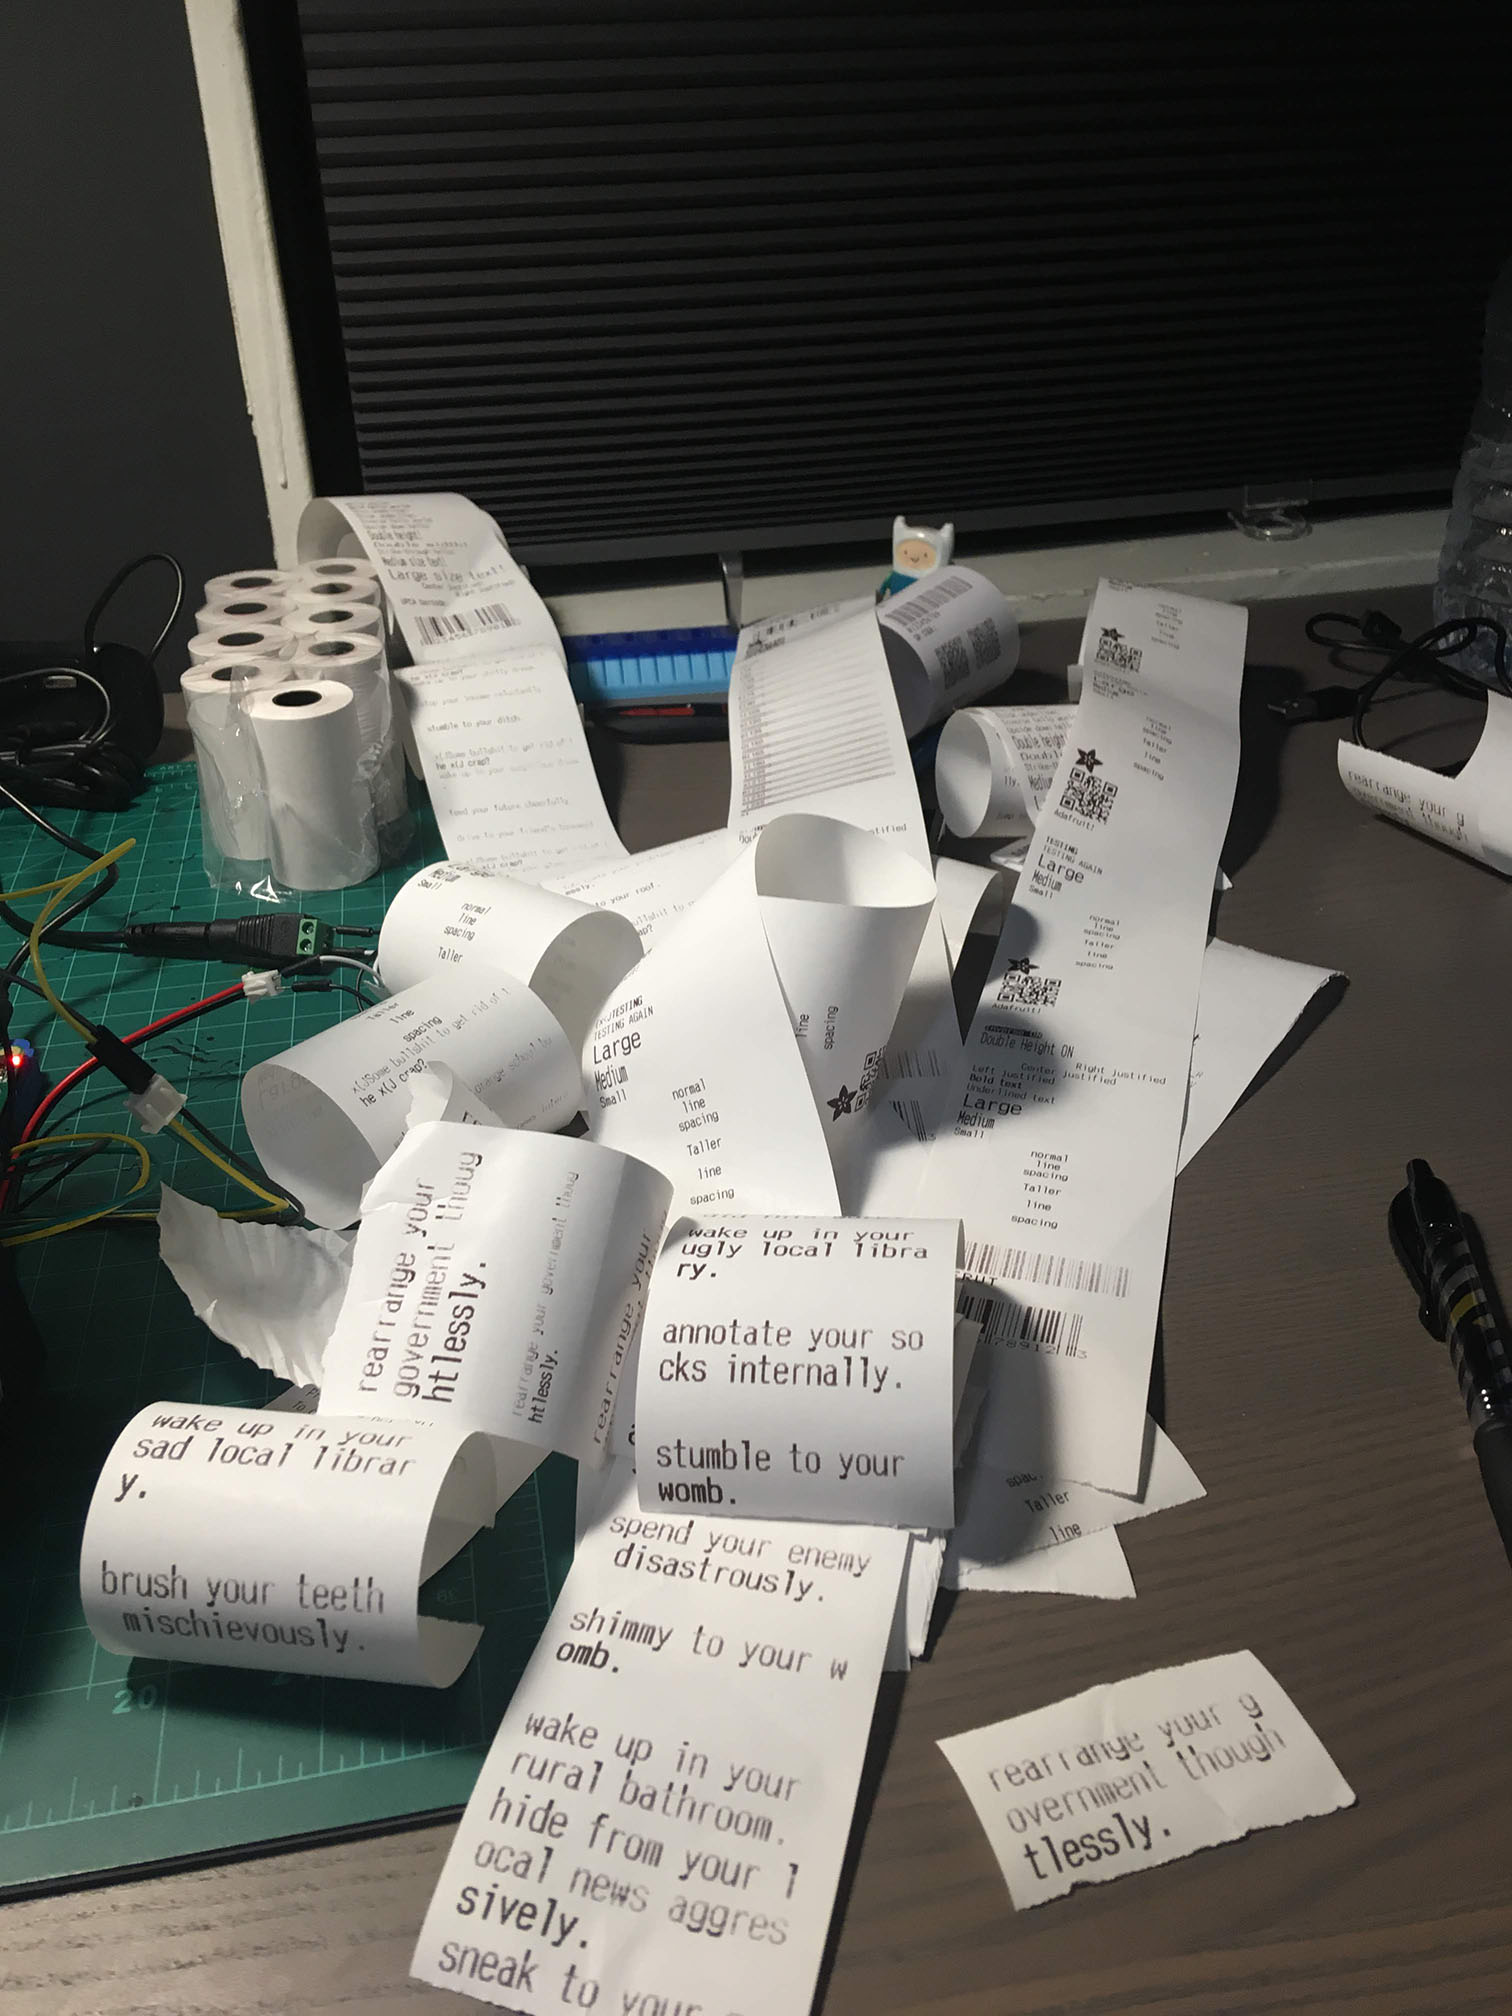
wake up in your (adjective) (place). (verb) your (noun) (adverb). (moveVerb) to your (place).

you are (adjective) again. (adverb), (verb) your (adjective) self and (verb) from the (noun). bearing  (noun) of (noun) on which a (noun) and a (noun) (verb) (adverb).

do you remember the first time you (pastverb) your (noun)? if only you could (verb) (occurrence), you might (verb) something for the (noun).
So first, we pick one of those structures. In the code this is accomplished by picking a random integer, then using a specific structure based on the integer selected. Then the structure generates each sentence by selecting random elements from arrays that store our different word types, like adjectives or movement verbs or nouns, to name a few. So now we have a few strings to represent our ritual. These are then passed on to the printer code…
Printer Code
The printer code has to perform a handful of operations on the line strings passed to it. Each string is passed to a function that checks how long it is. This function was written because there’s no built in text wrap on the printer, it just splits words when the character length for the line is exceeded. So our function checks how long the string is against our maximum line length variable, and if it is too long, it looks for the space between two words that is closest to the line maximum, and splits the string in two at that space. The function then recursively calls itself with the second string as an argument, to check the length of that string and repeat this process if necessary.
Once a line string has been made to fit on the thermal paper, it is printed out, and the printer feed is advanced before printing the next line, to create space between each line. Now that we’ve printed out the ritual for the user, we need to send stats to Adafruit IO!
Adafruit IO Code Part 2
Now that we’ve printed the ritual, our code does two things: it increments the printCount variable by one, and sends this updated value to the counter feed. It sends “Someone printed a ritual!” to the monitor feed, and then we want to send the entire new ritual, so we concatenate the line strings together and send the compound string to the monitor feed as well.
Adafruit IO
Here’s a quick look at our Adafruit IO dashboard for ritualbot.
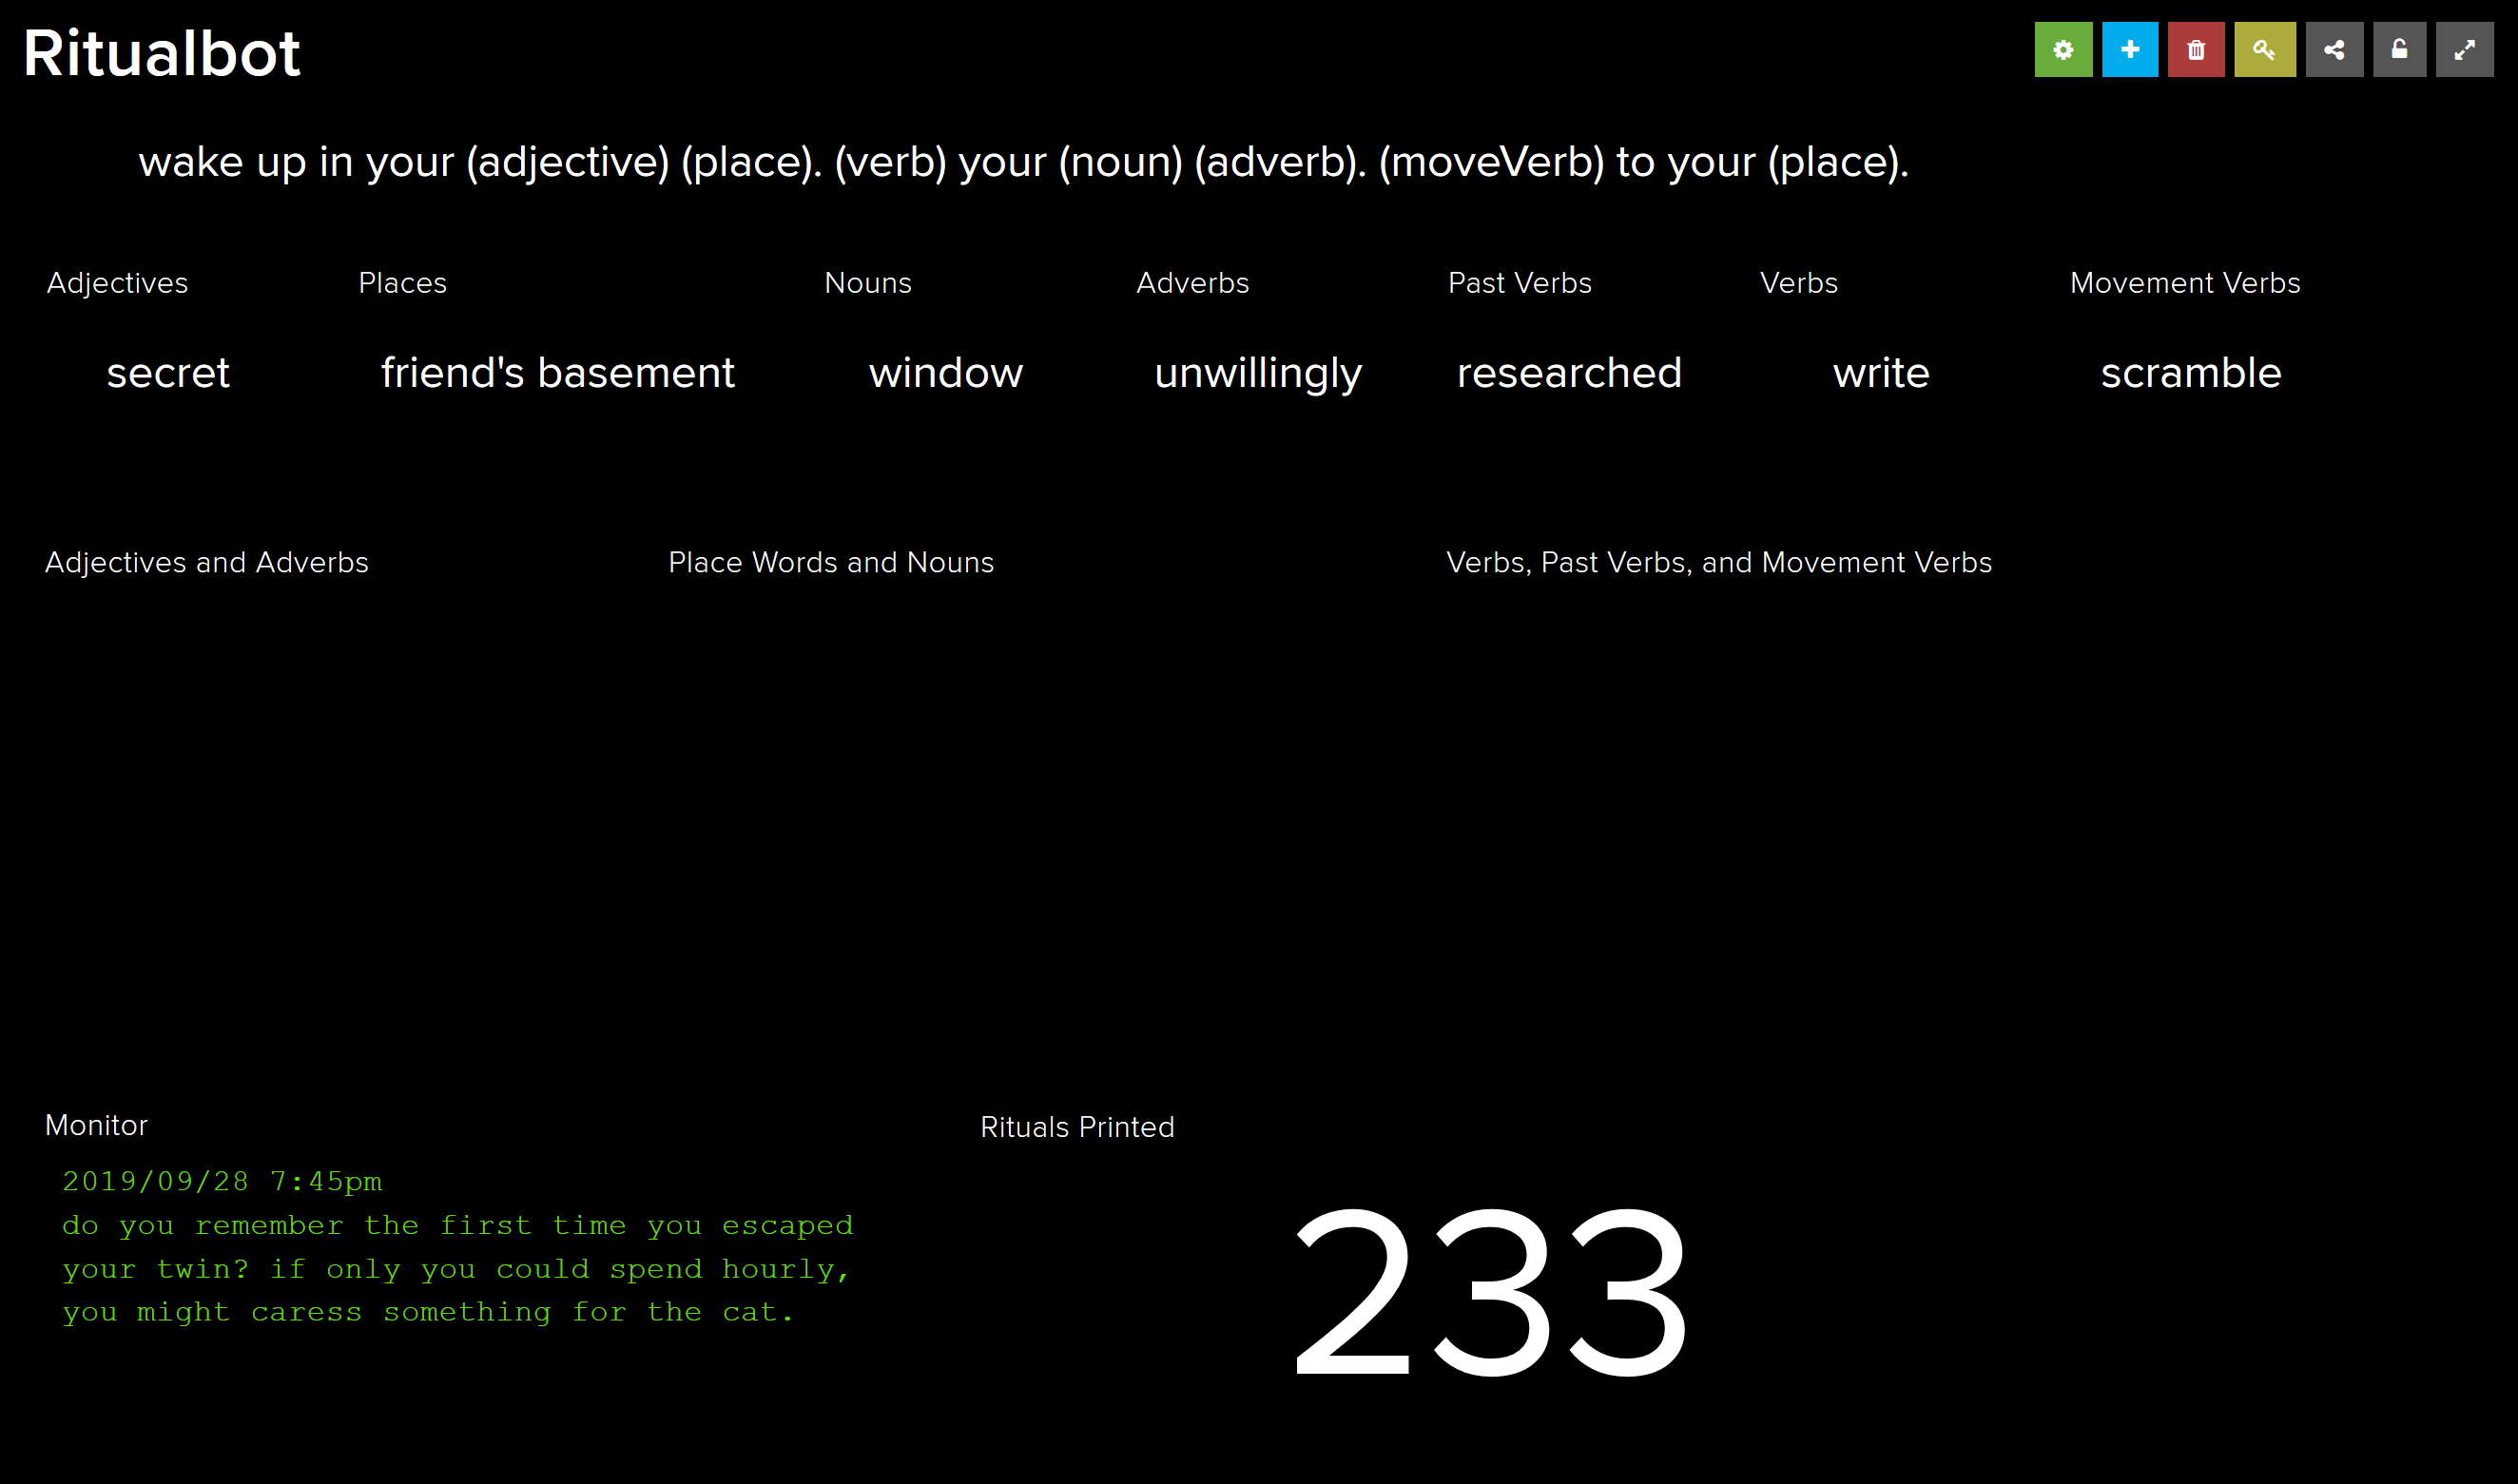
Our dashboard allows us to add new words to the word feeds on the fly, and also monitor ritualbot’s status and see how many rituals have been printed and what they said!
Hardware
In terms of hardware, we used the Mini model thermal printer from Adafruit! Working with it took some doing, as the libraries for doing so are not entirely complete, and have some bugs depending on which version of the printer you receive. Ours had a few issues, primarily printing out some seemingly-nonsense characters each time we ran the printer. I soon realized that the characters, x(J, were not nonsense at all, but was actually ASCII instructions that the library was trying to send to the printer, but was failing to do so for some reason. I had to hunt down the instructions that matched the ASCII values, and comment out those lines.
We also made use of a breadboard and a simple push button, we decided to go for the “DIY” barebones, barewires look. Connecting the button was fairly simple, but creating button callback code that worked in the framework I had set up also took some time.
The x(J Fix
Alright, I’m adding this section as an update. To my absolute delight, someone found this page while looking for a fix for this issue with the Adafruit thermal printer library. It would seem that this issue still persists, and since it’s such an unusual issue (that may or may not be limited to specific models of printer), there has been no patch or much discussion of a fix, if any. If you have this issue and wound up here, I hope these fixes help you!
I actually misspoke in the previous version of this post, calling the x(J characters “hex code” values, which is not what they are, they are ASCII characters. On a whim, I converted them to decimal values, and got the numbers 120, 40, 74. I realize how bizarre this sounds, but I was pulling my hair out trying to troubleshoot this, so I went hunting in the Python library file to see if those numbers showed up anywhere. As it turned out, the number 40 appears a handful of times when setting certain values for the printer.
I started commenting out lines one at a time, and testing to see if they had any effect on the issue, or if it would just break the printer. After a little trial and error, I ended up commenting out the lines 114 through 119, and lines 133 through 136, and that made the offending characters disappear. Here’s a link to the modified Adafruit_Thermal.py file.
I was a little concerned that this would impair the functionality of the printer, but we sent this piece to two gallery shows, and had zero issues. I also figure that if these lines of code were being accidentally interpreted as ASCII or being incorrectly interpreted somehow, those lines weren’t working correctly anyway, so I’d think it wouldn’t cause any lack of functionality.
To those of you using Arduino and the original Adafruit thermal printer library written in C++, I do not have such a direct fix. My advice would be to take a close look at any lines where writeBytes is called. This version appears to be sending ASCII characters directly, and the letters x and J show up a number of times as characters sent using the writeBytes function. Try commenting out those lines and see if anything changes, but your mileage may vary. I hope this helps!
Reflections
Challenges
On the software end, creating the custom text-wrapping function took up a lot of time. Mostly it was me searching for the Python functions that would do what I needed, and then tweaking to make sure we didn’t lose any text and everything looked neat. As far as hardware is concerned, the printer gave us a lot of trouble, though primarily for software reasons, as previously mentioned. Digging through and modifying the thermal printer libraries was a big time sink that involved some trial and error.
Next Steps
There are still a lot of quality-of-life improvements that can be made to the code, primarily being able to batch-add multiple words at once as opposed to just manual input. We’re also hoping to better link the physical version with the twitter bot, so they share a words base without manually bringing words from one to the other.
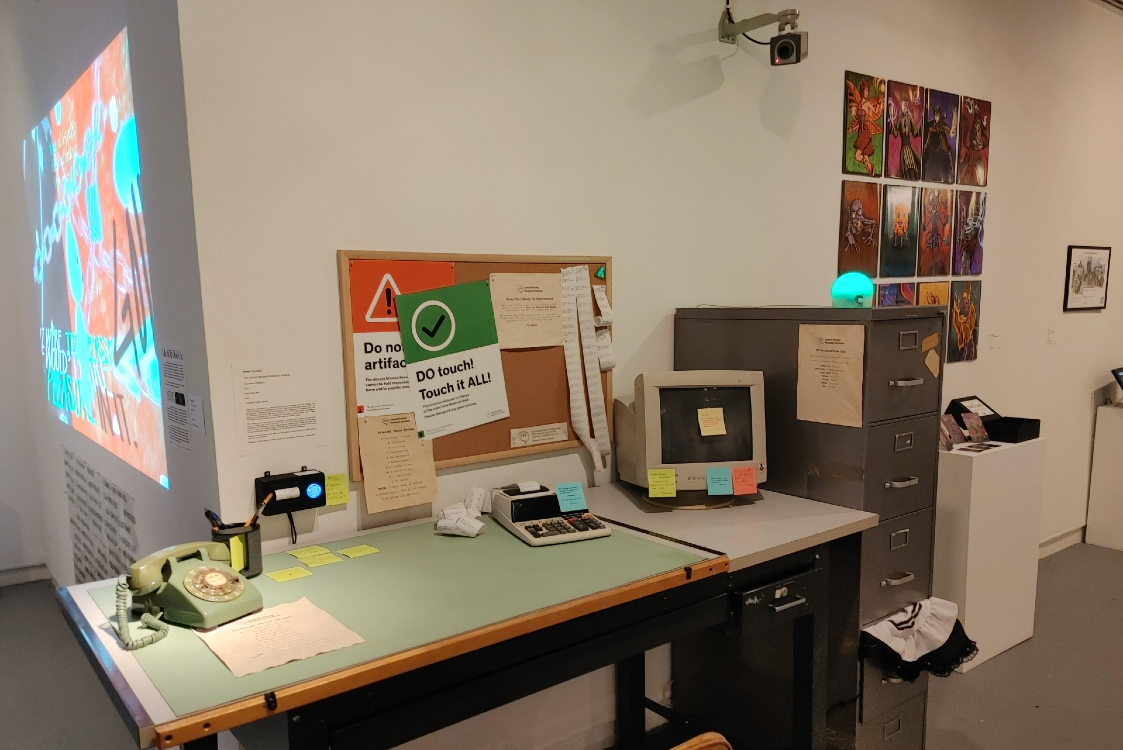
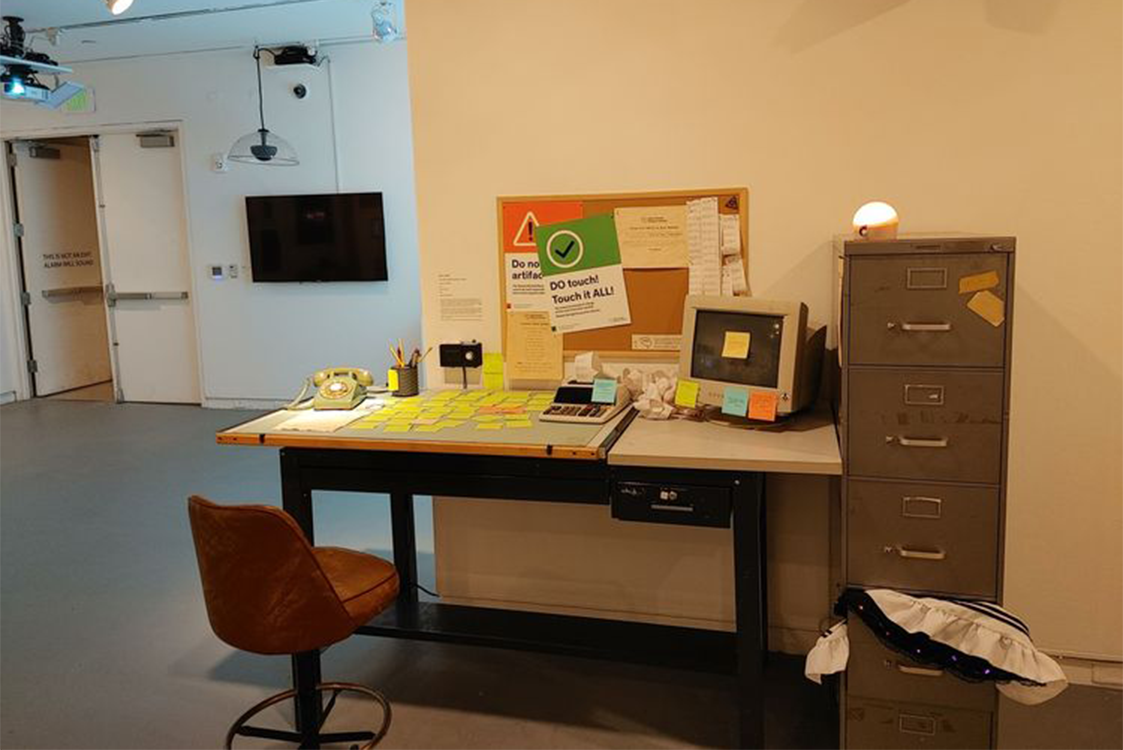
On Display
We had the opportunity to display ritualbot in the Ritual show in the Gateway gallery here at MICA, and as part of TechnoMEME 2, a juried exhibition run by Fuse Factory, an arts and technology initiative and gallery space in Columbus, Ohio. But we’re trying to find a new home for ritualbot, stay tuned! :)


Source Code
Here’s the source code for this project!